Svelte Client-side Application
Learning Objectives
- You know how to create and containerize a Svelte-based client-side application.
Now that you have Docker and Docker Compose (or an alternative like Podman) installed, we can start working on the walking skeleton.
Creating a Svelte project
Svelte is a modern JavaScript framework for building interactive web applications. It is a popular choice for building client-side applications due to its simplicity and performance. We take Svelte into use with Deno, which is a modern runtime for JavaScript and TypeScript.
For instructions on installing Deno, click here.
Inside the walking-skeleton folder with the compose.yaml file, run the command deno run -A npm:sv@latest create client to create a new Svelte project and a client folder for it. The command asks for a few options — use the following:
- Pick “SvelteKit minimal” as the Svelte app template.
- Select “No” when asked for whether to add type checking with TypeScript.
- Do not add anything to the project when asked “What would you like to add to your project?”.
- Select “None” when asked which package manager you wish to install dependencies with.
Once you have selected the options and press enter, a new Svelte project is created to the client folder. The structure of the whole project is now as follows.
$ tree --dirsfirst.├── client│ ├── src│ │ ├── lib│ │ │ └── index.js│ │ ├── routes│ │ │ └── +page.svelte│ │ └── app.html│ ├── static│ │ └── favicon.png│ ├── package.json│ ├── README.md│ ├── svelte.config.js│ └── vite.config.js└── compose.yamlNext, go to the folder client and run the command deno install --allow-scripts. The command installs the dependencies of the project.
$ cd client$ deno install --allow-scriptsOnce the dependencies have been installed, in the client folder, run the command deno run dev --open to start a development server and to open up the page in the browser. The command starts a development server that serves the Svelte application and opens it in the default web browser.
$ deno run dev --open... VITE v5.4.21 ready in 622 ms
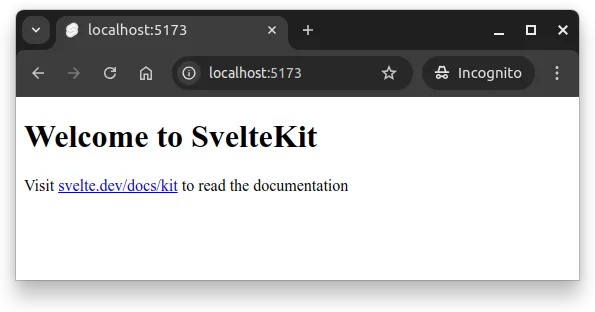
➜ Local: http://localhost:5173/ ➜ Network: use --host to expose ➜ press h + enter to show helpThe development server is available at the address http://localhost:5173. Accessing it in a browser, you should see a page with the text “Welcome to SvelteKit”, as shown in Fig. 1 below.
To shut down the server, press Ctrl + C in the terminal where the server is running.
Containerizing the Svelte Application
To containerize the Svelte application, we’ll first add a Dockerfile for it and then modify the compose.yaml file to include the client-side application as a service.
Adding a Dockerfile
To containerize the client-side application, we need to add a Dockerfile to the client folder. Create a file called Dockerfile to the client folder and add the following contents to it. Save the file.
FROM denoland/deno:alpine-2.8.1
WORKDIR /app
COPY package.json .
RUN deno install
COPY . .
CMD [ "run", "dev", "--host"]
The above Dockerfile uses an Alpine Linux based Deno image as the starting point and creates a folder app, setting that as the working directory for the image. Then, the file package.json that is used to define dependencies is copied to the image, after which the dependencies are cached with the deno install command. This is followed by copying the remaining files to the image, and stating the command for running the image; the command translates to deno run dev --host.
The
--hostflag is used to expose the server to the network. This is necessary when running the server in a container, as the server is not accessible from the host machine without it.
At this point, remove the node_modules folder from the client folder. This is important especially if you use an operating system that is not Linux, as the node_modules folder might contain files that are not compatible with the Linux-based Docker image.
Compose configuration
Next, we modify the compose.yaml file to add the client. Let’s call the service client. The service is built from the folder client of the project (i.e., the folder that has the Svelte application).
For development purposes, we bind the folder src in the folder client of our project to the src folder of the app folder of the container. This way, changes to the source code of the project are immediately reflected in the container. We also expose the port 5173 of the container to the port 5173 of the host machine.
The port 5173 is the default port on which the Svelte application starts. As the application is started in the container, the port is available for requests within the container, but not to the wider world. The port mapping in
compose.yamlexposes the port to the operating system.
Modify the compose.yaml file to match the following.
services: client: build: client restart: unless-stopped volumes: - ./client/src:/app/src ports: - 5173:5173Running the project
Now, in the root folder of the project, we can run the project using the docker compose up --build command. This builds the image and starts the container.
$ docker compose up --build... (loading dependencies, building images, ..)[+] Running 1/1 ✔ Container walking-skeleton-client-1 Created 0.1sAttaching to client-1client-1 | Task dev vite dev "--host"client-1 | Forced re-optimization of dependenciesclient-1 |client-1 | VITE v5.4.21 ready in 553 msclient-1 |client-1 | ➜ Local: http://localhost:5173/client-1 | ➜ Network: http://172.25.1.2:5173/Now, the Svelte frontend is available at the address http://localhost:5173.
If the application does not start, or if you are not able to access the application in the browser, check the terminal output for any error messages — also, possibly check your firewall configuration.
To stop the project, press Ctrl + C (or the cancel command specific to your operating system) in the terminal where we called the docker compose command. You may also explicitly run the command docker compose stop in the project folder to stop the containers created by the command docker compose up.
docker compose stopWhen we ran the command docker compose up --build, we stated that the containers outlined in the compose.yaml file should be built and started. If we would have omitted the --build flag, we would have used the images that have previously been built (if any existed) to launch the container — if none exist, Docker may ask whether these images should be built.
Summary
In summary:
- Svelte is a modern JavaScript framework for building interactive web applications.
- We created a Svelte-based client-side application and containerized it using Docker.
- We modified the
compose.yamlfile to include the client-side application as a service. - We ran the project using Docker Compose, making the Svelte application available at
http://localhost:5173.
At this point, you should have a folder called walking-skeleton with a folder called client and a file called compose.yaml. The client folder should contain the Svelte application and the Dockerfile for it. The structure of the project should be similar to the following (folders like node_modules and files like deno.lock are omitted).
$ tree --dirsfirst.├── client│ ├── src│ │ ├── lib│ │ │ └── index.js│ │ ├── routes│ │ │ └── +page.svelte│ │ └── app.html│ ├── static│ │ └── favicon.png│ ├── package.json│ ├── Dockerfile│ ├── README.md│ ├── svelte.config.js│ └── vite.config.js└── compose.yaml