Deno Server-side Application
Learning Objectives
- You know how to create and containerize a Deno-based server-side application.
At this point, you should have a walking skeleton with a working client-side application that you can start with the docker compose --build command. Now, we will add a server-side application that uses Deno.
Creating a Deno project
Deno is a modern runtime for JavaScript and TypeScript that is secure by default and comes with a rich standard library. Deno is a popular choice for building server-side applications due to its simplicity, security features, and built-in support for TypeScript.
To add a Deno project to the walking skeleton, navigate to the walking-skeleton folder in a terminal or using a file explorer. Then, create a folder called server to the walking-skeleton folder, and create the files app.js, app-run.js, and deno.json into the server folder.
At this point, the contents of the walking-skeleton folder should be as follows.
$ tree --dirsfirst.├── client│ └── (client-side project files)├── server│ ├── app.js│ ├── app-run.js│ └── deno.json└── compose.yamldeno.json
The deno.json file is used to define dependencies for the Deno project. In our case, we will use the Hono web framework.
Copy the following into the file deno.json file.
{ "imports": { "@hono/hono": "jsr:@hono/hono@4.8.12" }}app.js
The app.js file is the entrypoint to our application: it loads and configures the web framework, and defines the routes for the application.
We’ll learn about the terminology used in web applications, such as routes, in later parts of the course.
Copy the following to the app.js file.
import { Hono } from "@hono/hono";import { cors } from "@hono/hono/cors";import { logger } from "@hono/hono/logger";
const app = new Hono();
app.use("/*", cors());app.use("/*", logger());
let visits = 0;app.get("/api/visits", (c) => {  visits++;  return c.json({ visits });});
export default app;
The reason why statements such as import { Hono } from "@hono/hono"; work is that we defined the dependency in the deno.json file. The dependency @hono/hono points to jsr:@hono/hono@4.8.12, which resolves to Hono in the JavaScript registry.
app-run.js
The app-run.js file is used to start the Deno server. Finally, copy the following code to the app-run.js file.
import app from "./app.js";
Deno.serve(app.fetch);The reason to separate application logic (in app.js) startup code (in app-run.js) is that this makes it easier to test the application — we can import the application logic in tests without starting the server.
Running the Deno application
Now, navigate to the server folder in a terminal. Then, run the command deno run --allow-net app-run.js to start the server. Running the command shows the following output.
$ deno run --allow-net app-run.jsListening on http://0.0.0.0:8000/ (http://localhost:8000/)When we open the address http://localhost:8000/api/visits in a browser, we should see the message {"visits":1}. Reloading the page increments the visit count.
Figure 1 below shows what the page looks like in the browser when it is loaded once.
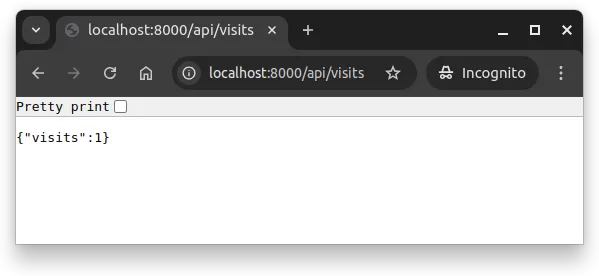
{"visits":1}.To stop the Deno server, press Ctrl + C (or the cancel command specific to your operating system) in the terminal where you started the server.
Containerizing the Deno Application
Let’s next add the server-side application to the Docker Compose setup. This involves creating a Dockerfile for the server-side application and modifying the compose.yaml file to include the server-side application as a service.
Adding a Dockerfile
Create a file called Dockerfile to the folder server, and copy the following contents to it.
FROM denoland/deno:alpine-2.8.1
WORKDIR /app
COPY deno.json .
RUN deno install
COPY . .
CMD [ "run", "--allow-env", "--allow-net", "--watch", "app-run.js" ]
The above Dockerfile uses an Alpine Linux based Deno image as the starting point and creates a folder app, setting that as the working directory for the image. Then, the file deno.json that is used to define dependencies is copied to the image, after which the dependencies are cached with the deno install command. This is followed by copying the remaining files to the image, and stating the command for running the image.
The base image denoland/deno:alpine includes deno as entrypoint, so the given instructions after CMD are passed to the deno executable. Effectively, the last line of the Dockerfile translates to the following command:
deno run --allow-env --allow-net --watch app-run.jsAt this point, remove the deno.lock file from the server folder. This is important especially if you use an operating system that is not Linux, as the deno.lock file might link to files that are not compatible with the Linux-based Docker image.
Compose configuration
Then, modify the compose.yaml (in the walking-skeleton folder) to match the following.
services:  client:    build: client    restart: unless-stopped    volumes:      - ./client/src:/app/src    ports:      - 5173:5173    depends_on:      - server
  server:    build: server    restart: unless-stopped    volumes:      - ./server:/app    ports:      - 8000:8000
The above configuration states that we have two containers — the service called client that we created in the last chapter and a newly added service server. In addition, the client service depends on the server service.
The service server is built from the folder server, and it is restarted unless it is stopped (restart: unless-stopped). The volumes section states that the folder server is mounted to the folder /app in the container — in effect, this means that any changes that we do in the folder server in our local file system are reflected to the contents of the container. The ports section states that the port 8000 is exposed from the container as the port 8000 in the operating system.
Running the project
Once the changes are made (and the files are saved!), we can run the application with Docker Compose using the command docker compose up --build. The command is run from the folder that contains the compose.yaml file.
$ docker compose up --build(downloading and building images)[+] Running 2/2 ✔ Container walking-skeleton-server-1 Created ✔ Container walking-skeleton-client-1 RecreatedAttaching to client-1, server-1server-1 | Watcher Process started.server-1 | Listening on http://0.0.0.0:8000/ (http://localhost:8000/)client-1 | Task dev vite dev "--host"client-1 | Forced re-optimization of dependenciesclient-1 |client-1 | VITE v5.4.21 ready in 534 msclient-1 |client-1 | ➜ Local: http://localhost:5173/client-1 | ➜ Network: http://172.25.1.3:5173/After waiting for a few moments, there are two applications running: the client-side application that we created in the last chapter (at http://localhost:5173) — and the server-side application that we just created (at http://localhost:8000).
You can test that the visit counter works by opening the address http://localhost:8000/api/visits in a browser. You should see a response like {"visits":1}. If you refresh the page, the number increases.
You can also test the API in the terminal with the command curl http://localhost:8000/api/visits, which should return the same response.
$ curl localhost:8000/api/visits{"visits":1}%$ curl localhost:8000/api/visits{"visits":2}%$ curl localhost:8000/api/visits{"visits":3}%To stop the project, press Ctrl + C (or the cancel command specific to your operating system) in the terminal where we called the docker compose command.
Summary
In summary:
- Deno is a modern runtime for JavaScript and TypeScript that is secure by default and comes with a rich standard library.
- We created a Deno-based server-side application using the Hono web framework.
- We containerized the Deno application using Docker.
- We modified the
compose.yamlfile to include the server-side application as a service. - We ran the project using Docker Compose, making the Deno application available at
http://localhost:8000.
At this point, you should have a folder called walking-skeleton with two folders, one called client and the other called server. The structure of the project should be similar to the following (folders like node_modules and files like deno.lock are omitted).
$ tree --dirsfirst.├── client│ ├── src│ │ ├── lib│ │ │ └── index.js│ │ ├── routes│ │ │ └── +page.svelte│ │ └── app.html│ ├── static│ │ └── favicon.png│ ├── package.json│ ├── Dockerfile│ ├── README.md│ ├── svelte.config.js│ └── vite.config.js├── server│ ├── app.js│ ├── app-run.js│ └── deno.json└── compose.yaml