Svelte Pages and Layouts
Learning Objectives
- You know how to create multiple pages in Svelte and know how to navigate between pages.
- You know how to define a layout and know how to define page-specific content for the head element.
Here, we’ll start our journey to learning Svelte. In this chapter, we show how to create multiple pages in a Svelte application, how to navigate between the pages, and how to define a layout that is used across the pages.
Svelte is a component-based framework for building web applications. In Svelte, the application is built from components, which are self-contained pieces of code that can be reused in different parts of the application. Components can contain HTML, CSS, and JavaScript code, and they can also contain other components.
Creating pages
Pages in Svelte correspond to folders in the src/routes/ folder of the client-side project. Each page is defined in a file called +page.svelte that is placed to the folder that corresponds to the page. As an example, a page that is defined in the file src/routes/about/+page.svelte corresponds to the path /about in the application.
A path is a part of a URL that identifies a specific resource on the server. For example, in the URL
http://localhost:5173/about, the path is/about. The path is used to determine which page to show in the application.
To try this out, go to your walking skeleton and create two new folders to src/routes/. Name the first folder about, and the second folder contact. Create a new +page.svelte file to the about folder, placing the following content to the +page.svelte in the folder.
<p>This is my about page!</p>Then, create a new +page.svelte file to the contact folder, placing the following content to the +page.svelte in the folder.
<p>You can contact me here.</p>At this point, the contents of the src/routes folder (and its subfolders) should be as follows.
tree --dirsfirst.├── about│ └── +page.svelte├── contact│ └── +page.svelte└── +page.svelte
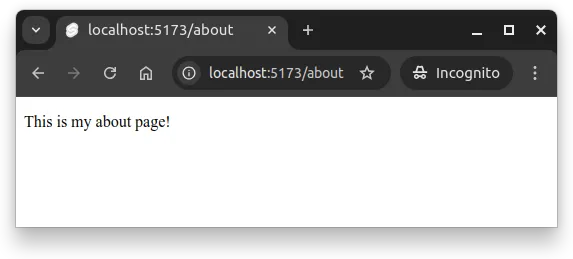
2 directories, 3 filesNow, when you run the application and open it up in a browser, the page at http://localhost:5173/about looks similar to Figure 1.
Similarly, the address http://localhost:5173/contact has the contact page with the text “You can contact me here.”.
Navigating between pages
To navigate between the pages in the application, we need to add hyperlinks. First modify the +page.svelte file in the about folder to match the following.
<p>This is my about page!</p>
<nav>  <ul>    <li><a href="/">Home</a></li>    <li><a href="/about">About</a></li>    <li><a href="/contact">Contact</a></li>  </ul></nav>
And then, modify the +page.svelte file in the contact folder to match the following.
<p>You can contact me here.</p>
<nav>  <ul>    <li><a href="/">Home</a></li>    <li><a href="/about">About</a></li>    <li><a href="/contact">Contact</a></li>  </ul></nav>
Now, when you open up the address http://localhost:5173/about in a browser, you see the about page with links to the home page and the contact page. Similarly, when you open up the address http://localhost:5173/contact, you see the contact page with links to the home page and the about page.
Clicking e.g. the link “About” takes you to the about page, while clicking the link “Contact” takes you to the contact page.
The main page at the address http://localhost:5173/ does not contain the links, however. To add the links to the main page, modify the +page.svelte file in the root of the src/routes/ folder to match the following.
<p>Hello world!</p>
<nav>  <ul>    <li><a href="/">Home</a></li>    <li><a href="/about">About</a></li>    <li><a href="/contact">Contact</a></li>  </ul></nav>
Now, when you open up the address http://localhost:5173 in a browser, you see the main page with links to the about and contact pages.
Above, we just hit the rule of three. The rule of three states that when you copy-paste the same code three times, the code should be extracted to a separate method. We can apply the same rule to web development.
As the navigation is the same on all pages, we should extract it to a separate component. However, as it is something that would be the same across pages, it should go to a layout file.
Creating a layout
The term layout refers to the common layout of the application that is used for all (or for the majority) of the pages. Layouts can include content such as a header, a footer, and the functionality for navigating between pages.
In Svelte, the application layout is defined in a file called +layout.svelte that is placed to the folder src/routes/. The layout file is a Svelte component that can contain other Svelte components. It also comes with a special functionality that is used to render the “children” of the layout — that is, the content of each page in the application.
Create the file +layout.svelte to the folder src/routes/, and place the following contents to the file.
<script> let { children } = $props();</script>
<nav> <ul> <li><a href="/">Home</a></li> <li><a href="/about">About</a></li> <li><a href="/contact">Contact</a></li> </ul></nav>
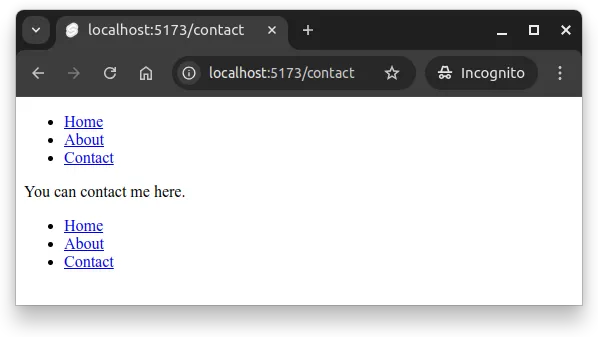
{@render children()}Above, we define a layout that contains a navigation element with links to the home, about, and contact pages. Now, when we open up the application in a browser, we see the layout with the links to the pages, and the contents of the pages are rendered in the layout.
However, as both the layout and the page files now contain the navigation, the navigation is shown twice on each page, as shown in Figure 2.
To address the issue, we can now remove the repetitive navigation from the pages. As an example, modify the +page.svelte file in the about folder to match the following.
<p>This is my about page!</p>Once done, remove the navigation from the other pages as well. Now, when you open up the application in a browser, you see the layout with the links to the pages, and the contents of the pages are rendered in the layout.
When creating the pages, Svelte takes the content of each +page.svelte file, and gives the content as a property children to the layout file. The content of each page is rendered to the location marked with {@render children()} in the layout file, and the rendered page — with the layout — is placed to the location that corresponds to the path of the page.
The layout file can contain other common parts of the application as well, such as a header and a footer. For example, with the following layout file, each page in the application would have a header, a navigation, the content of the page, and a footer.
<script>  let { children } = $props();</script>
<header>  <h1>My application</h1></header>
<nav>  <ul>    <li><a href="/">Home</a></li>    <li><a href="/about">About</a></li>    <li><a href="/contact">Contact</a></li>  </ul></nav>
<div>  {@render children()}</div>
<footer>  <p>My application is cool.</p></footer>
Page-specific head element
Individual pages might have different titles, meta tags, and other content in the <head> element of the page. For example, the title of a page is often page-specific. In Svelte, the contents of the <head> element of the page can be defined with the svelte:head element.
To demonstrate this, modify the +page.svelte file in the about folder so that the contents of the file are as follows.
<svelte:head> <title>About</title></svelte:head>
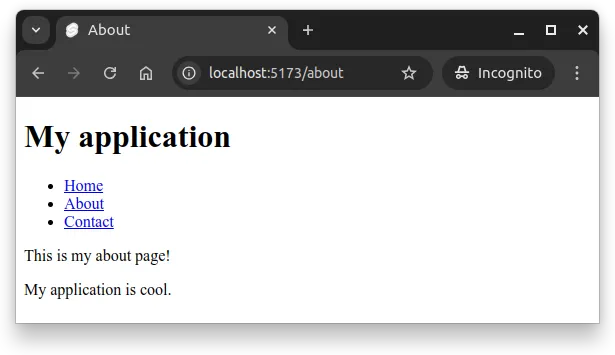
<p>This is my about page!</p>Now, when opening up the about page, the browser tab shows the title “About”, as shown in Figure 3. The figure also shows what the page would look like when the above layout with the header, footer, and navigation is used.
The underlying reason why this works is that SvelteKit injects the contents of svelte:head to the location marked with %sveltekit.head% in the app.html file of the src folder. If you take a peek at app.html, the file looks as follows.
<!doctype html><html lang="en"> <head> <meta charset="utf-8" /> <link rel="icon" href="%sveltekit.assets%/favicon.png" /> <meta name="viewport" content="width=device-width, initial-scale=1" /> %sveltekit.head% </head> <body data-sveltekit-preload-data="hover"> <div style="display: contents">%sveltekit.body%</div> </body></html>The above file also contains the %sveltekit.body% that is replaced with the contents of each page (with the layout, if a layout exists).
Note! After trying the above examples in your walking skeleton, please clean up the changes you made to the layout. In course assignments, the tests might expect that no layout is defined — expectations are outlined in the assignment instructions; additional changes might cause tests to fail.
Summary
To summarize:
- Pages in Svelte are defined in the
src/routes/folder, with each page being defined in a file called+page.sveltethat is placed to a folder that corresponds to the path of the page. - Navigation between pages is done with hyperlinks.
- A layout is defined in a file called
+layout.sveltethat is placed to thesrc/routes/folder. The layout can contain common parts of the application, such as a header, a footer, and navigation. - The contents of each page are rendered in the layout at the location marked with
{@render children()}. - The contents of the
<head>element of each page can be defined with thesvelte:headelement.